Pro Quality Chain Breaker™


Pro Quality Chain Breaker™ fits all bicycle chains and is the easy way to add and remove chain links. Comes with a spare link set so you can quickly and effeciently replace worn out chains and maintain your drive train.
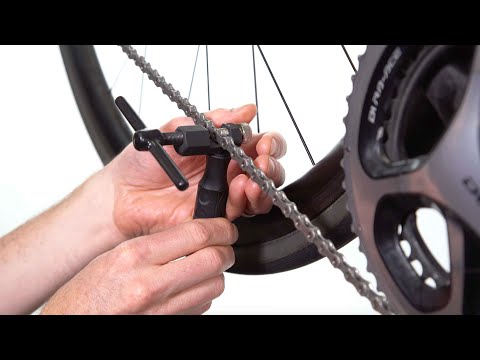
Instructions:
Step 1: Loosen the Adjusting Bolt & Pin Pusher Arm to allow space for chain.
Step 2: Slide Chain Breaker onto chain. Now, tighten the Adjusting Bolt until it securely touches side plate of the chain.
Step 3: Slowly tighten Pin Pusher Arm clockwise until links separates. (If you'd like to reuse your chain, be careful not to push the pin past the outer plate.)
Step 4: When installing a new chain, you'll need to break it to the proper length. (A helpful tip is to using your old chain as a guide to determine how many links of the new chain you'll need to remove.) Once you've determined the correct length, use the Chain Breaker Tool to remove excess links. (Remember, be careful not to push the pin past the outer plate when removing excess links.)
Step 5: Install your new chain around the smallest front chain ring and smallest rear cog. Connect the chain by seating the inner link into the outer link with the semi-installed pin. Now, use the Chain Breaker Tool to reinstall the pin into the inner and outer link.
Step 6: Finally, make sure your new chain is properly lubricated.